


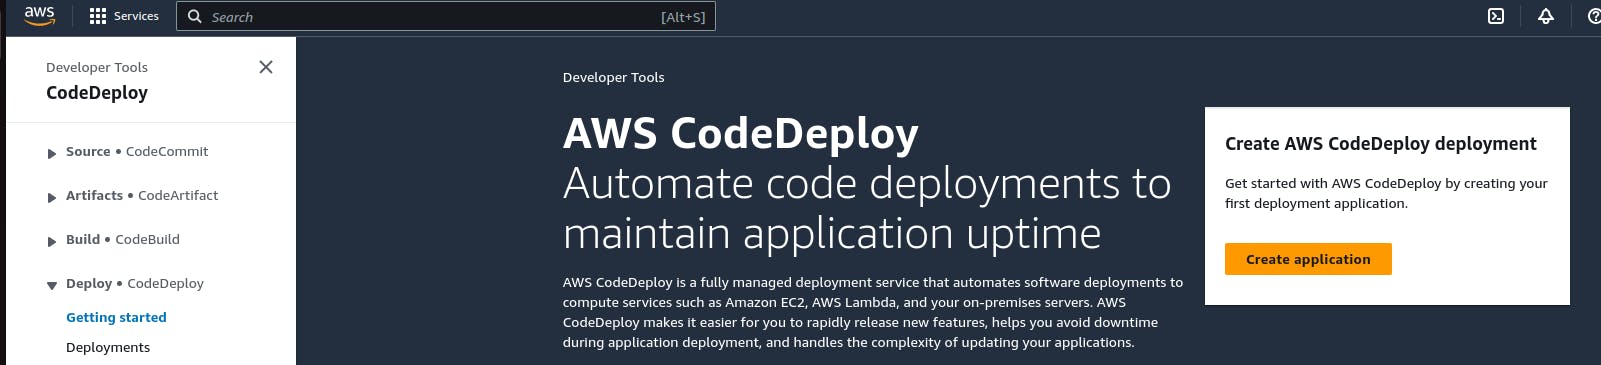
What is CodeDeploy?
AWS CodeDeploy is a deployment service that automates application deployments to Amazon EC2 instances, on-premises instances, serverless Lambda functions, or Amazon ECS services.
CodeDeploy can deploy application content that runs on a server and is stored in Amazon S3 buckets, GitHub repositories, or Bitbucket repositories. CodeDeploy can also deploy a serverless Lambda function. You do not need to make changes to your existing code before you can use CodeDeploy.
Task 1
Read about appspec.yaml file for CodeDeploy.
The appspec.yml file is used in AWS CodeDeploy to define the deployment specification for your application. It is a YAML file that describes the deployment process, including the deployment lifecycle hooks and the files to be copied to the deployment targets.
The appspec.yaml file typically includes the following sections:
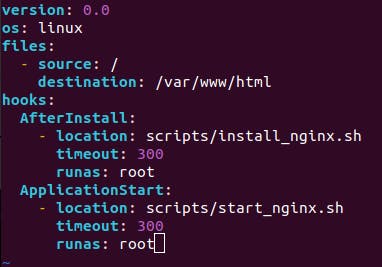
The version field specifies the version of the deployment specification. Currently, 0.0 is the only supported version.
The os field specifies the operating system used by the deployment target. In this case, it is set to Linux.
The resources section allows you to define resource groups to manage your AWS resources, such as Auto Scaling groups or Amazon EC2 instances.
The hooks section defines the lifecycle event hooks for different deployment phases. In this example, it specifies hooks for BeforeInstall, AfterInstall, ApplicationStop, and ApplicationStart. Each hook specifies the location of a script file to be executed during that phase.
The files section specifies the files to be copied from the source location to the destination location on the deployment target. In this case, it copies all files from the root (/) of the source location to the /var/www/html/ directory on the target.
Deploy index.html file on EC2 machine using nginx
Firstly, launch an instance.

Log in to the AWS Management Console and navigate to the CodeDeploy service and click on "Create application".
Enter name and select compute platform and click on 'Create application'.
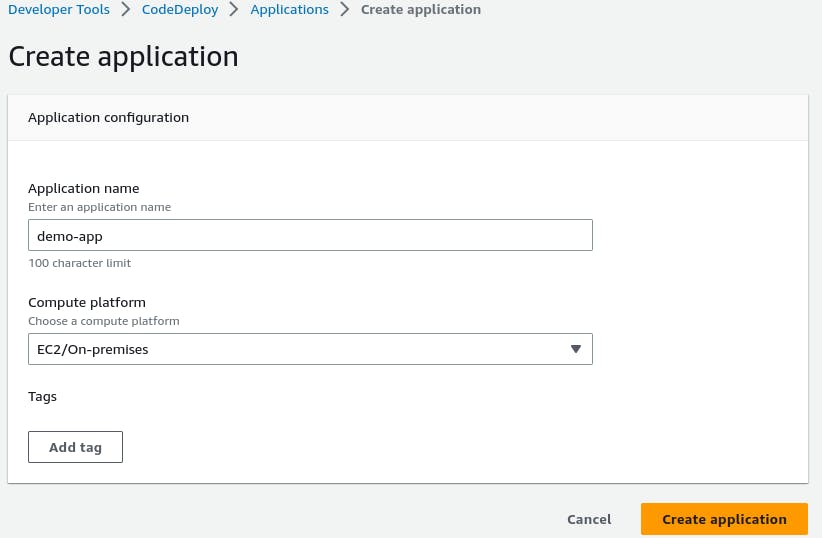
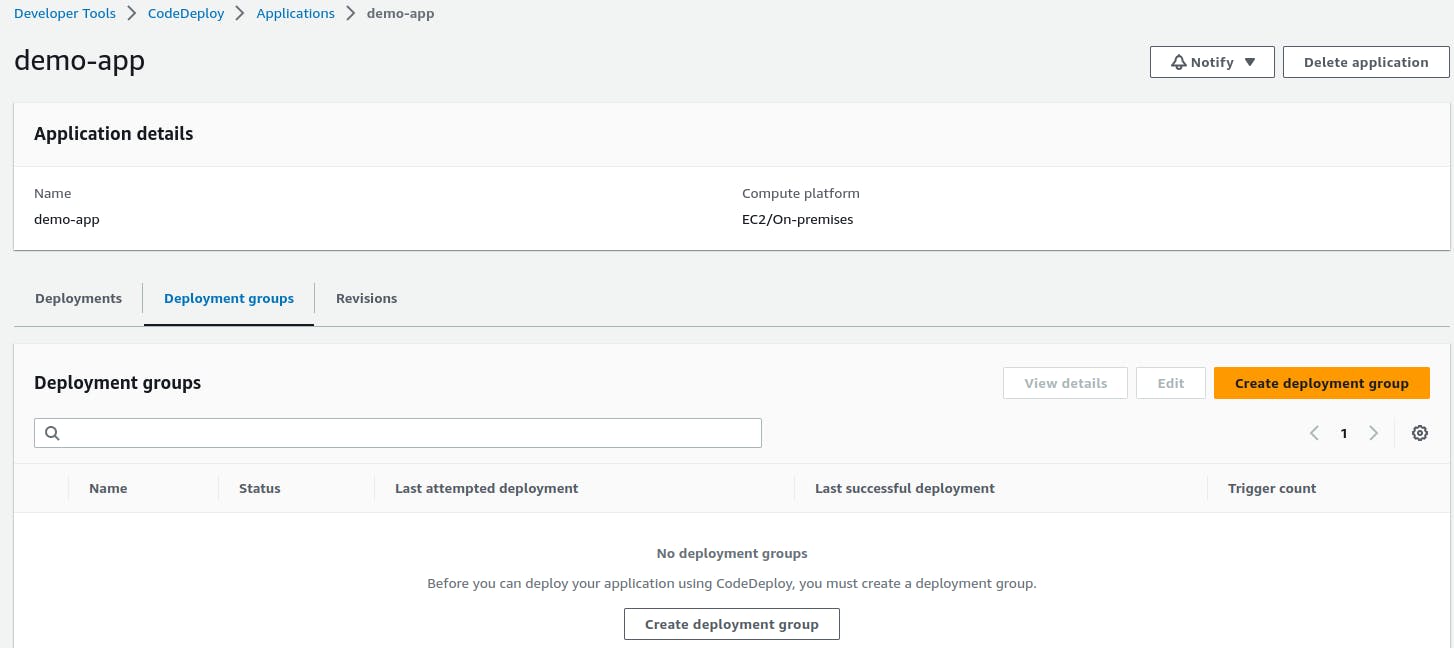
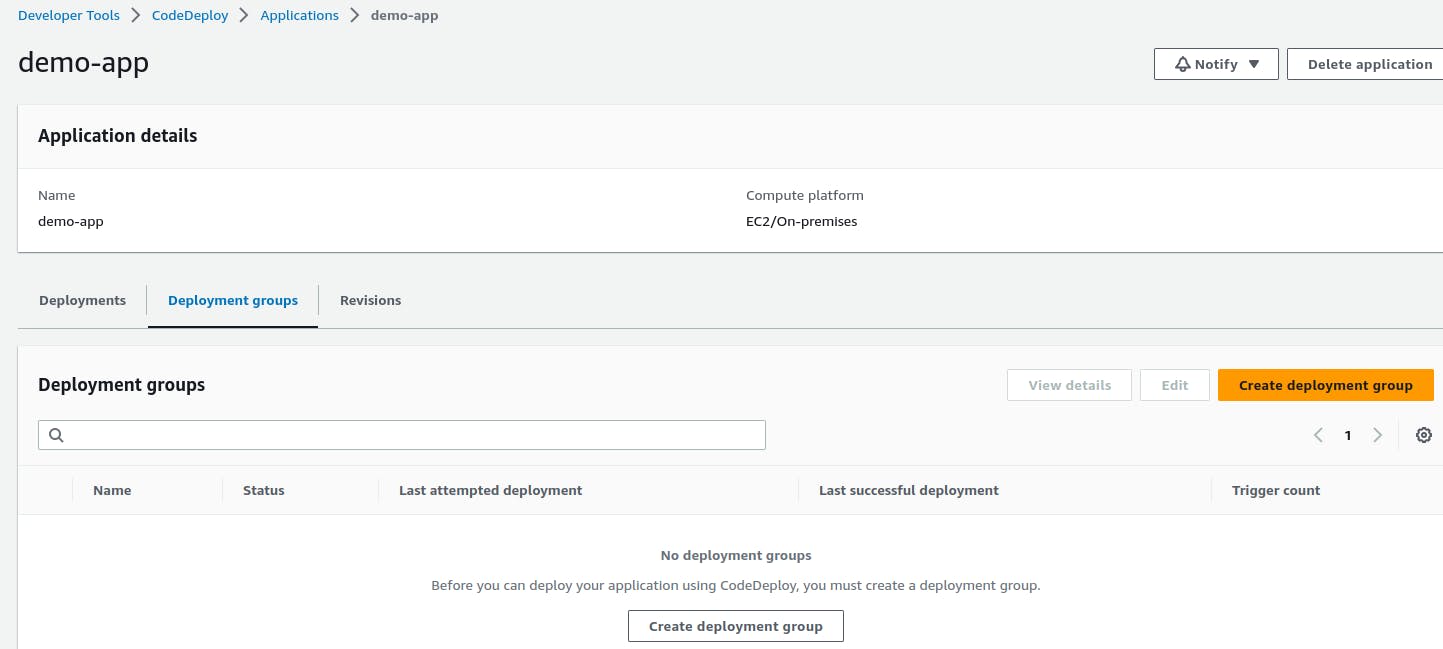
The application is successfully created.
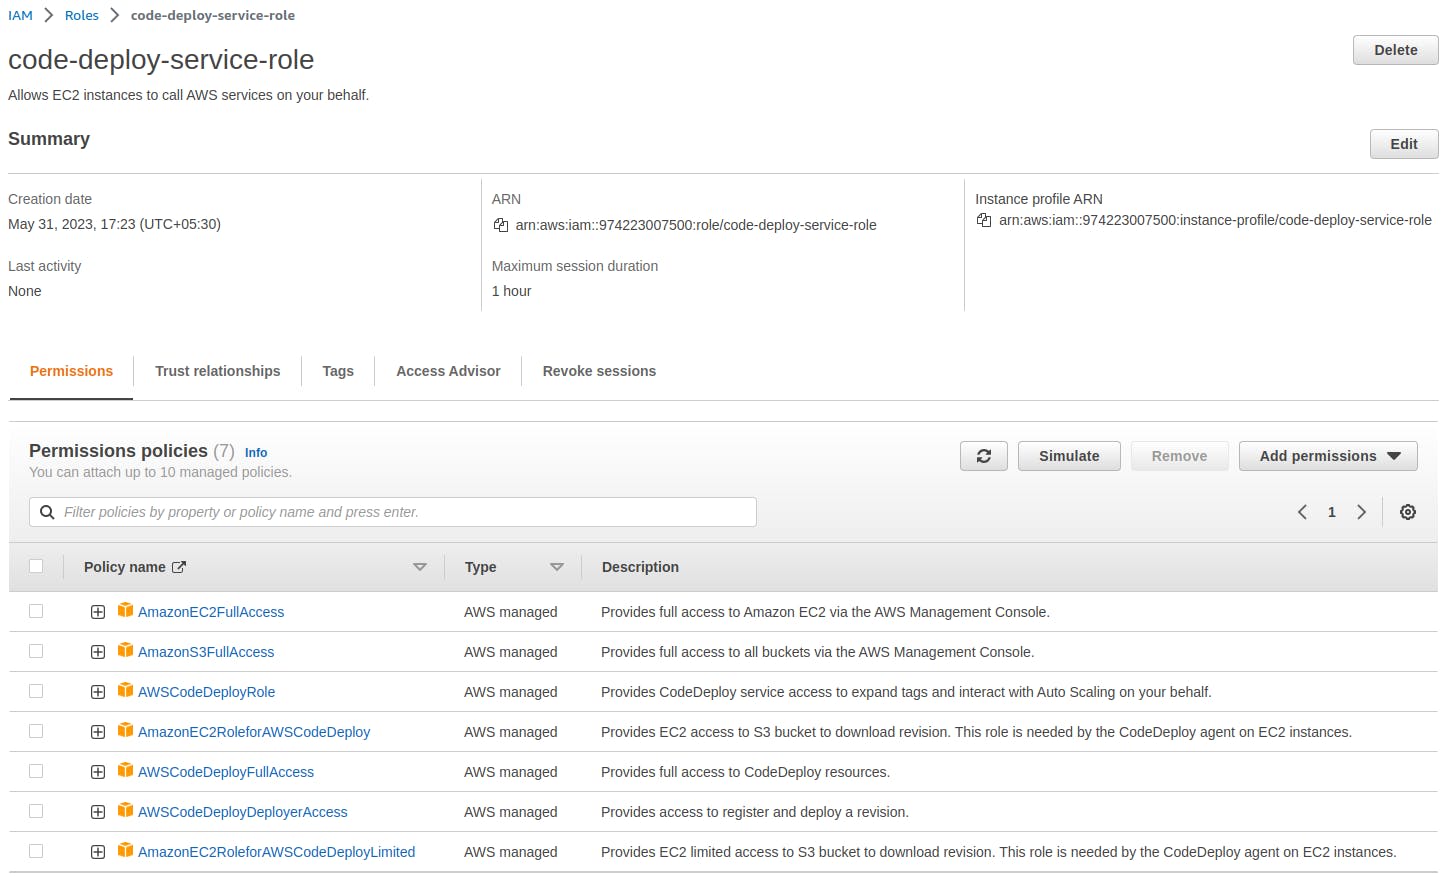
Create a 'service role' for enabling communication between code deploy and other AWS services. Go to IAM service and create 'code-deploy-service-role' with the below permissions.
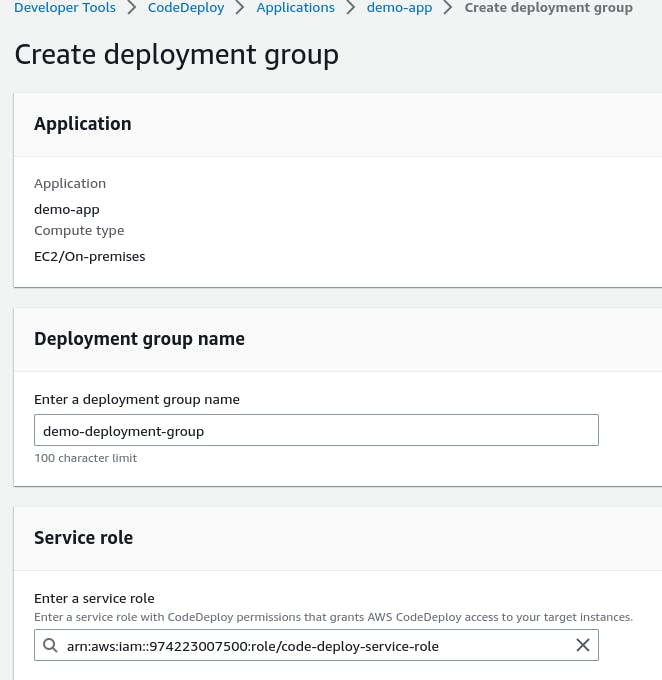
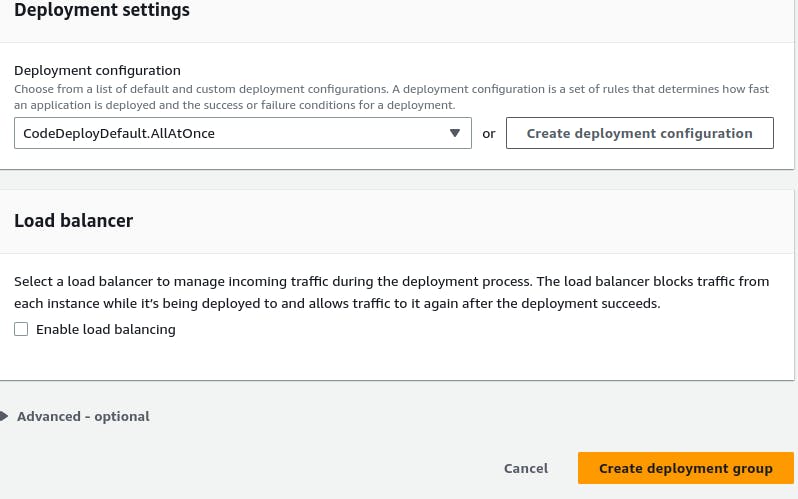
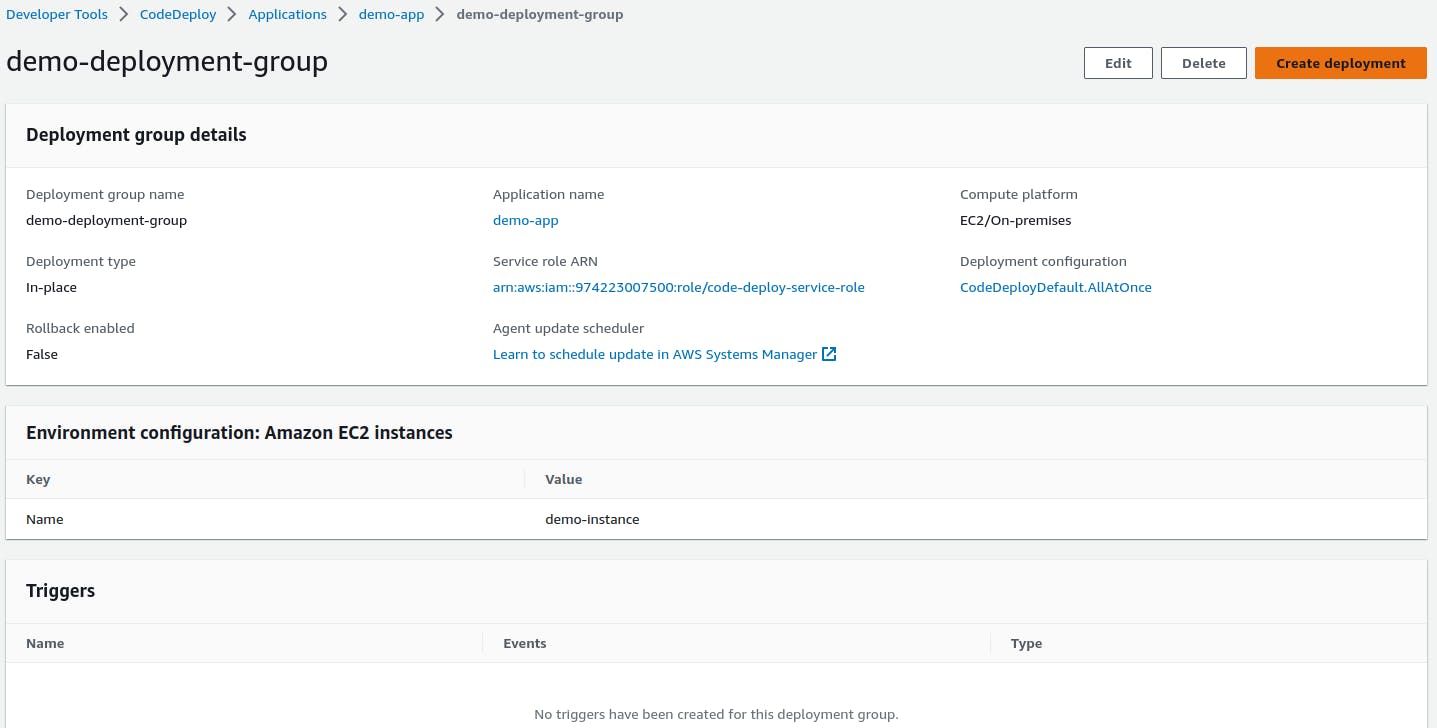
Now click on 'Create deployment group'.
Enter name and select service role which we created in above steps.
Choose EC2 instances and put name and value.
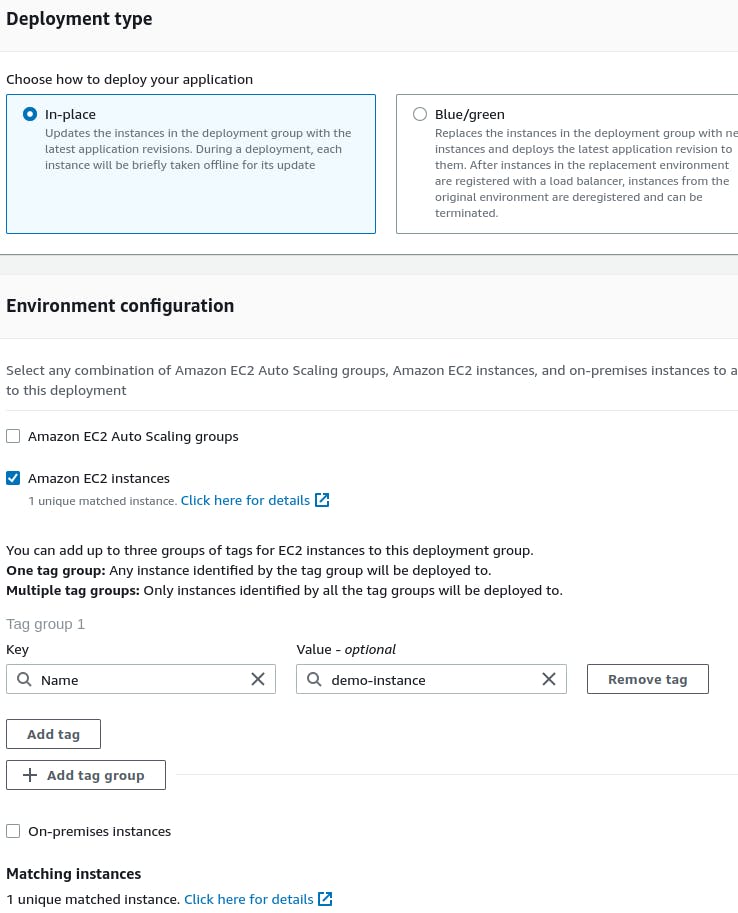
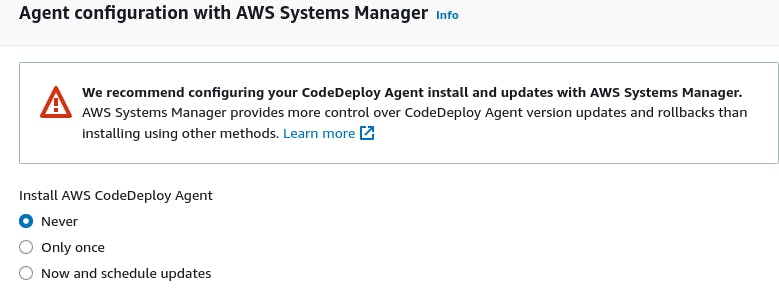
Select never for installing code deploy agent and uncheck loadbalancer.
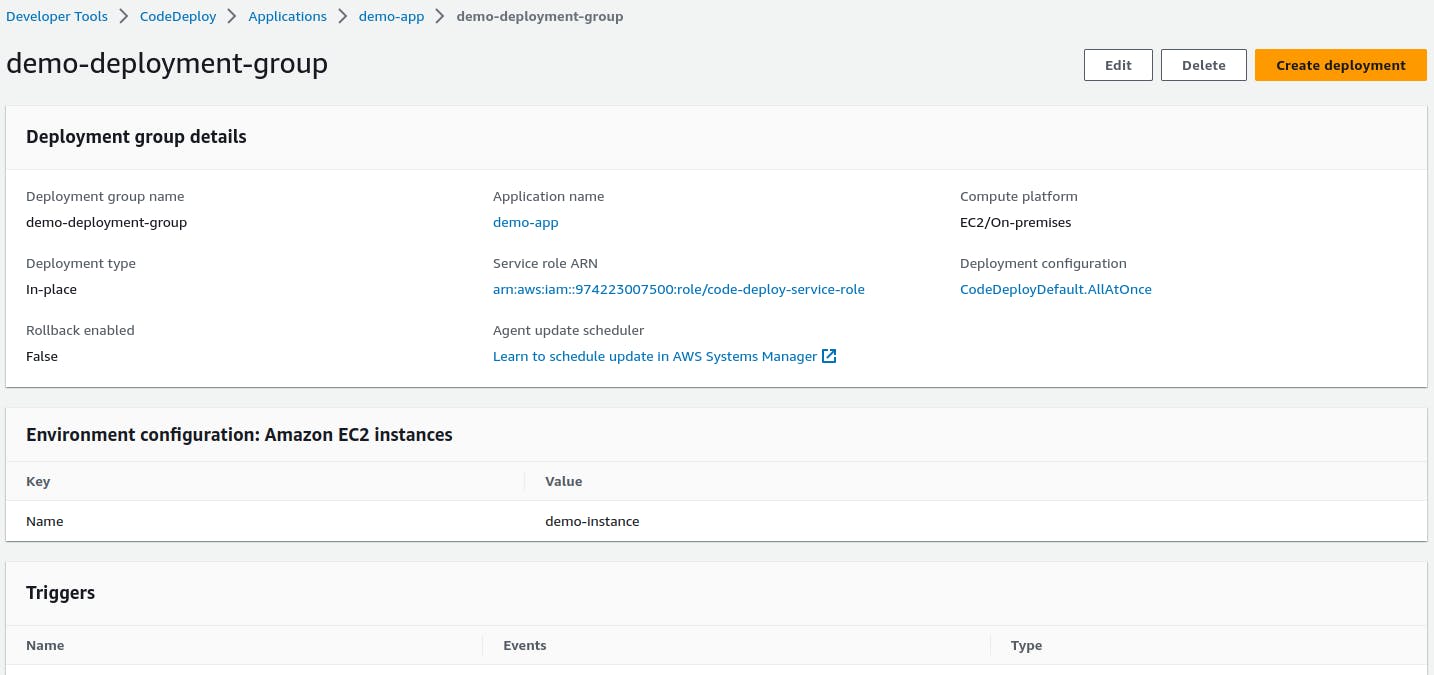
A deployment group is now created.
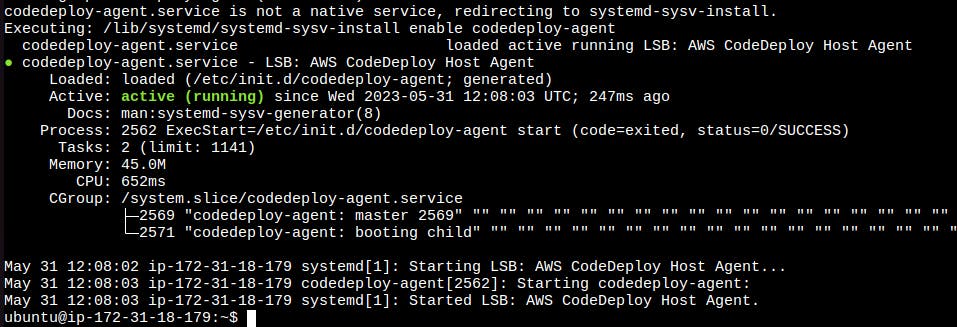
We have to set up a CodeDeploy agent in order to deploy code on EC2
We need to install the CodeDeploy agent on the server.
We have written a script file with all the dependencies.
  #!/bin/bash
  # This installs the CodeDeploy agent and its prerequisites on Ubuntu 22.04.
  sudo apt-get update
  sudo apt-get install ruby-full ruby-webrick wget -y
  cd /tmp
  wget https://aws-codedeploy-us-east-1.s3.us-east-1.amazonaws.com/releases/codedeploy-agent_1.3.2-1902_all.deb
  mkdir codedeploy-agent_1.3.2-1902_ubuntu22
  dpkg-deb -R codedeploy-agent_1.3.2-1902_all.deb codedeploy-agent_1.3.2-1902_ubuntu22
  sed 's/Depends:.*/Depends:ruby3.0/' -i ./codedeploy-agent_1.3.2-1902_ubuntu22/DEBIAN/control
  dpkg-deb -b codedeploy-agent_1.3.2-1902_ubuntu22/
  sudo dpkg -i codedeploy-agent_1.3.2-1902_ubuntu22.deb
  systemctl list-units --type=service | grep codedeploy
  sudo service codedeploy-agent status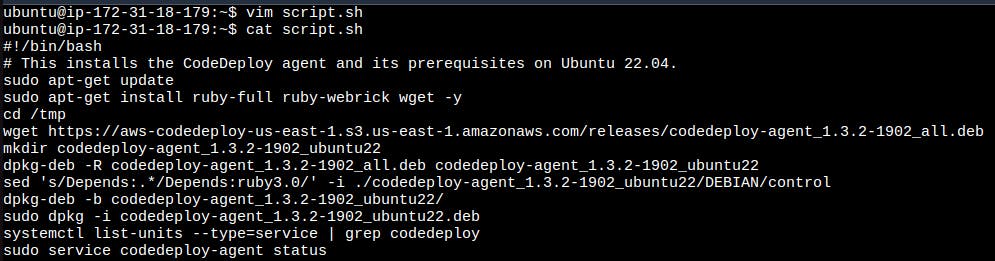
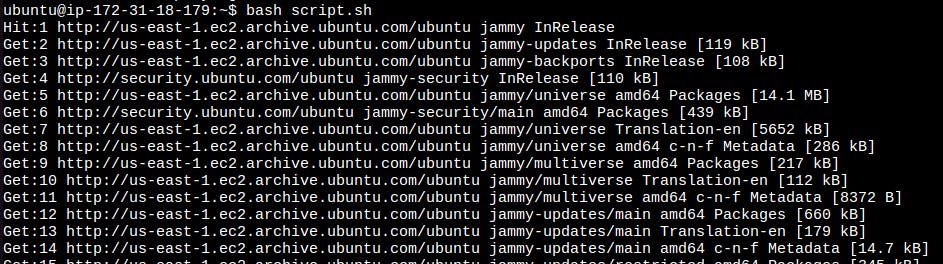
Run the script.
The code deploy agent is running.
Task 2
Add appspec.yaml file to CodeCommit Repository and complete the deployment process.
Here we have created an appspec.yaml file that deploys the index.html file on nginx.
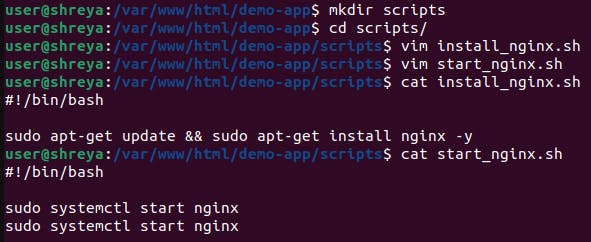
Also, we have to create 2 scripts for installing nginx and starting nginx under the scripts folder.
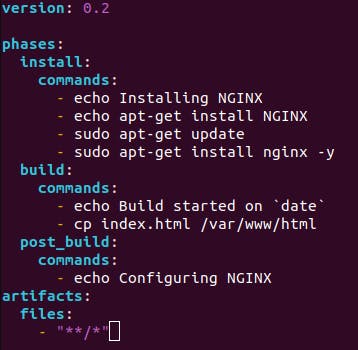
Make sure to change the buildspec.yml file so that the CodeBuild will build the appspec.yml file and transfer the artifact to the S3 bucket.
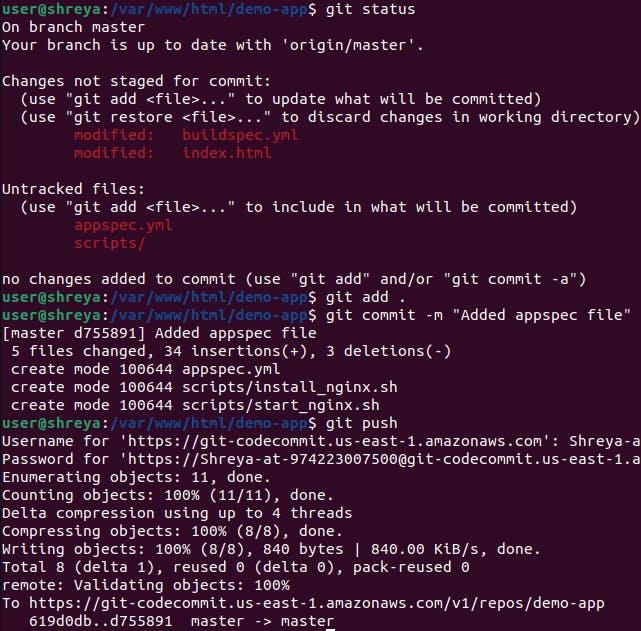
Push all the files to code commit.
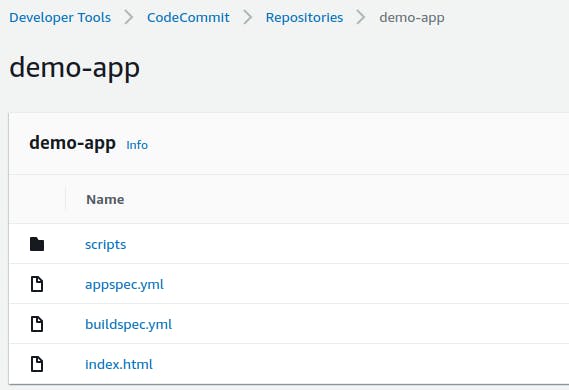
We can see all the files in the CodeCommit repository.
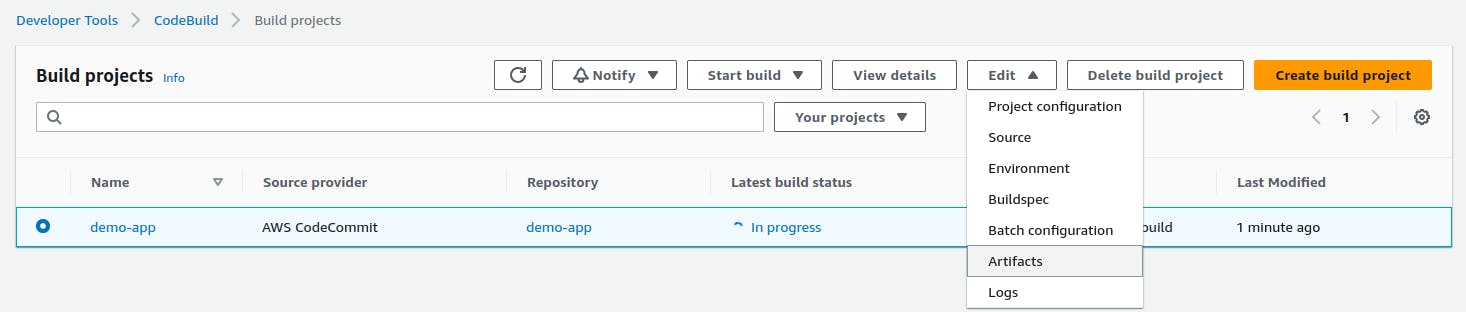
In build projects, Edit and choose 'Artifacts'.
Enter path and packaging type zip and update.
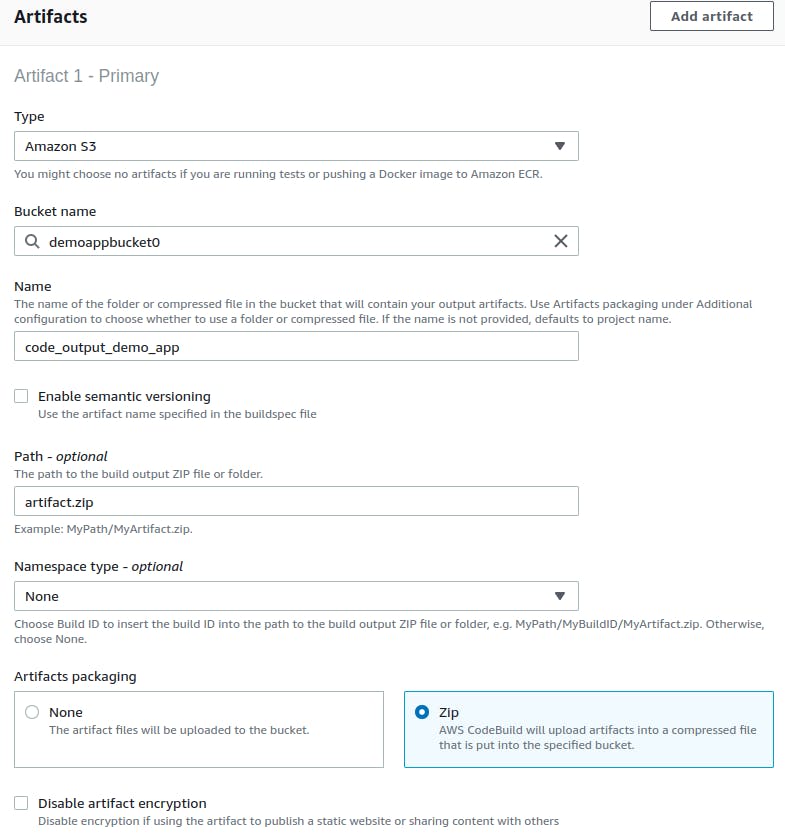
Artifact upload location successfully added. Click on 'Start build'.
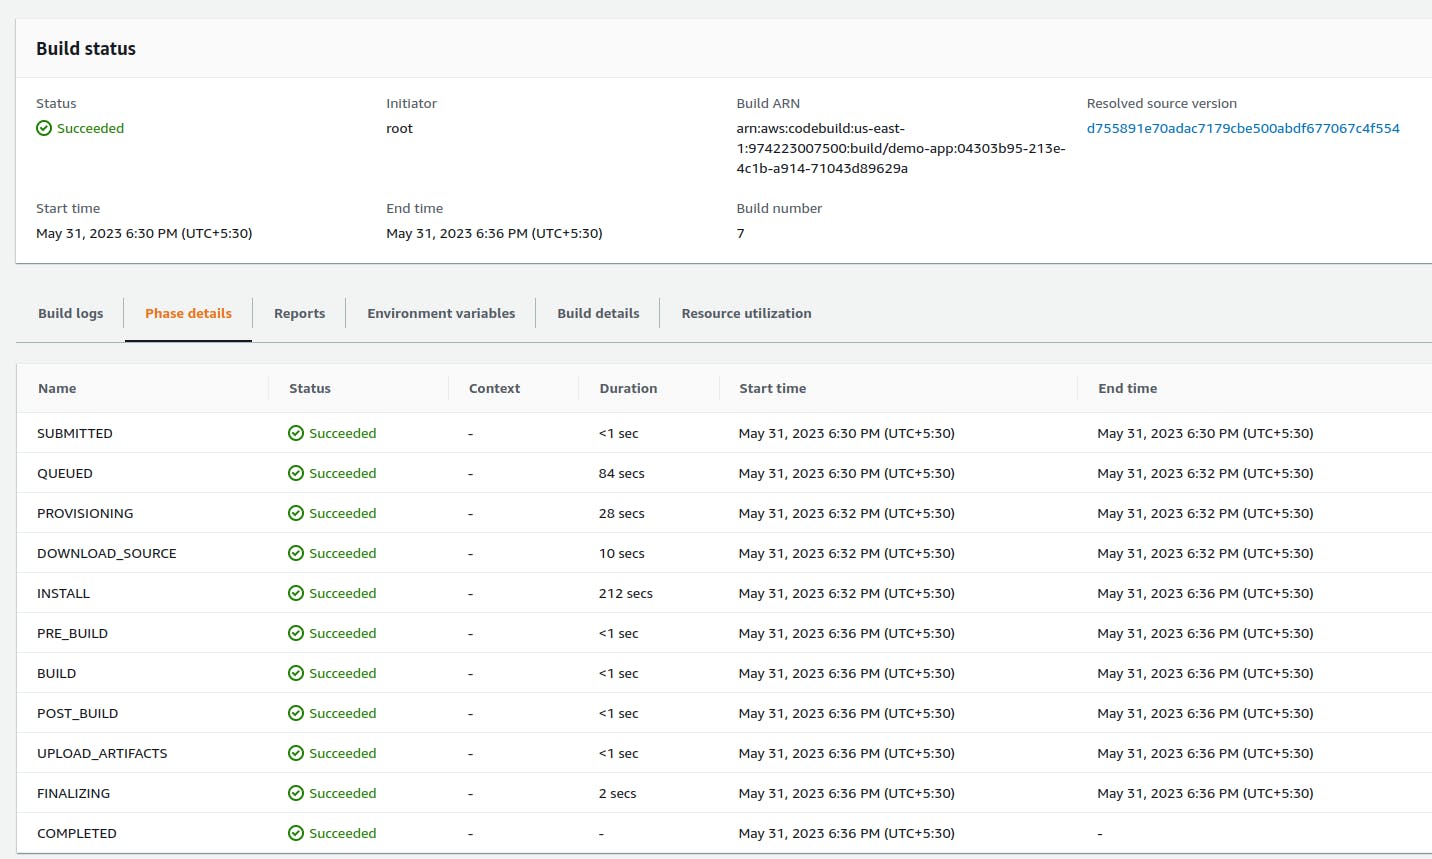
After building completion, go to the S3 bucket and copy the S3 URI.
Now create a deployment in the deployment group that we made previously.
In revision type, select Amazon S3 and paste the above copied S3 url to the revision location.
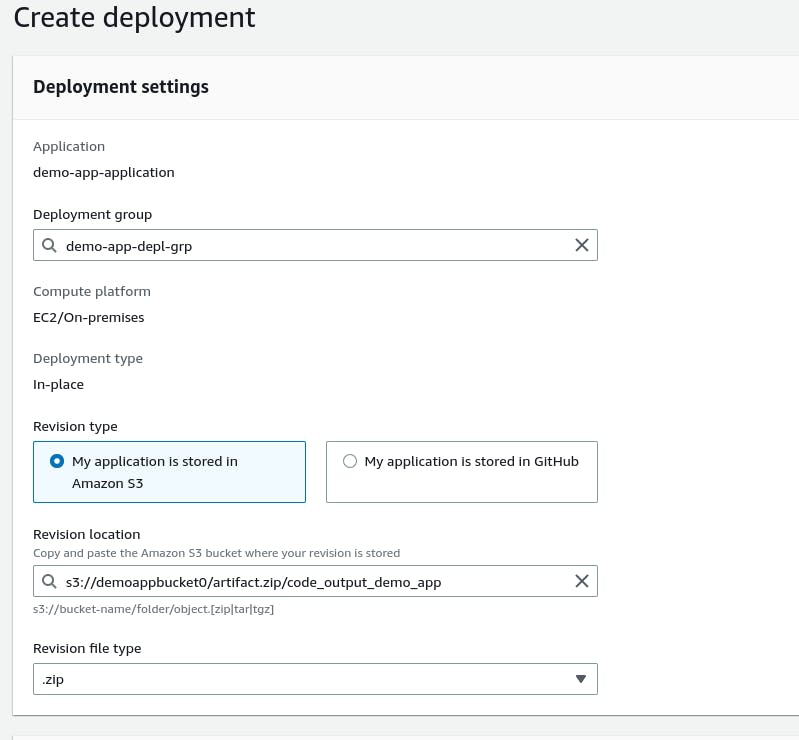
Click on 'Create deployment'.
Deployment is created. but events are pending.
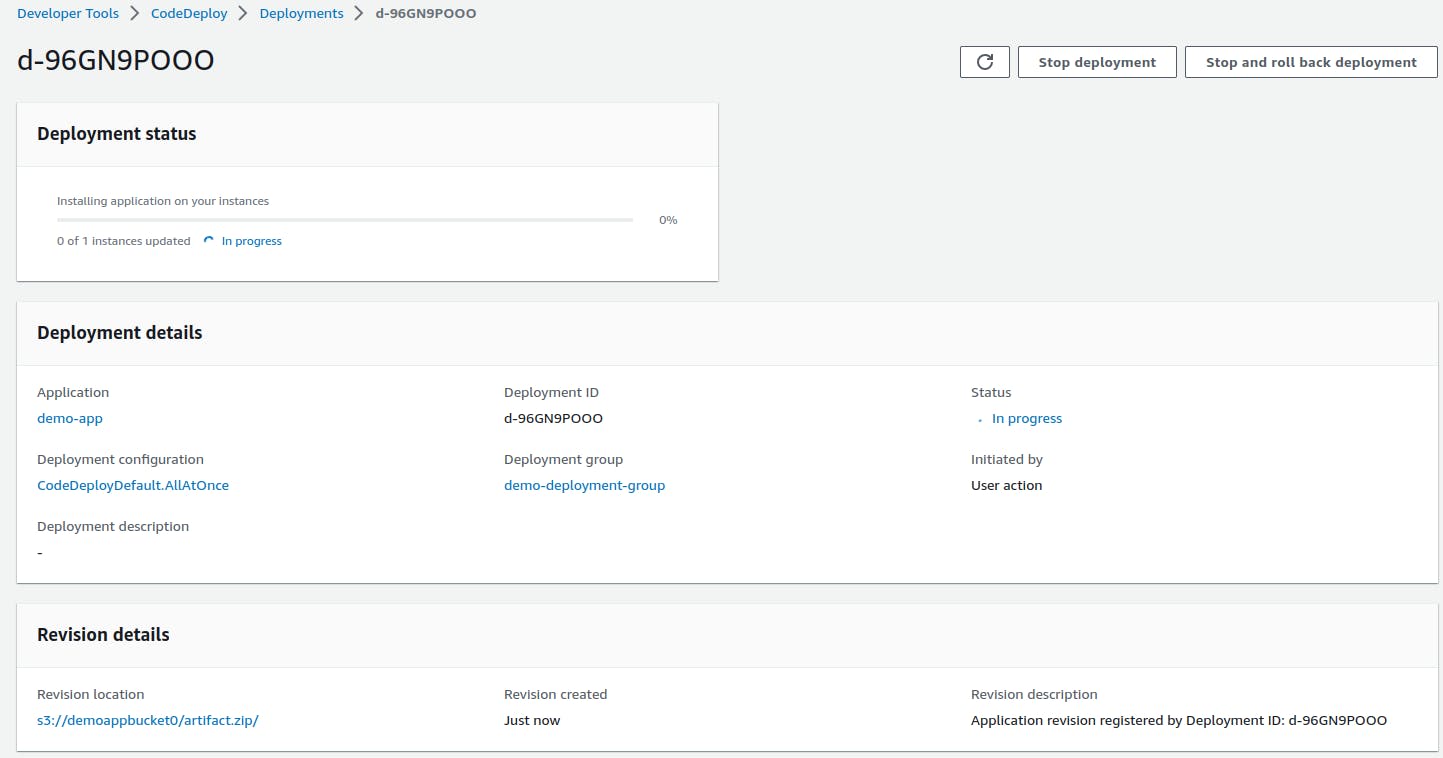
EC2 doesn't have any role policy to retrieve the data from S3 to CodeDeploy.
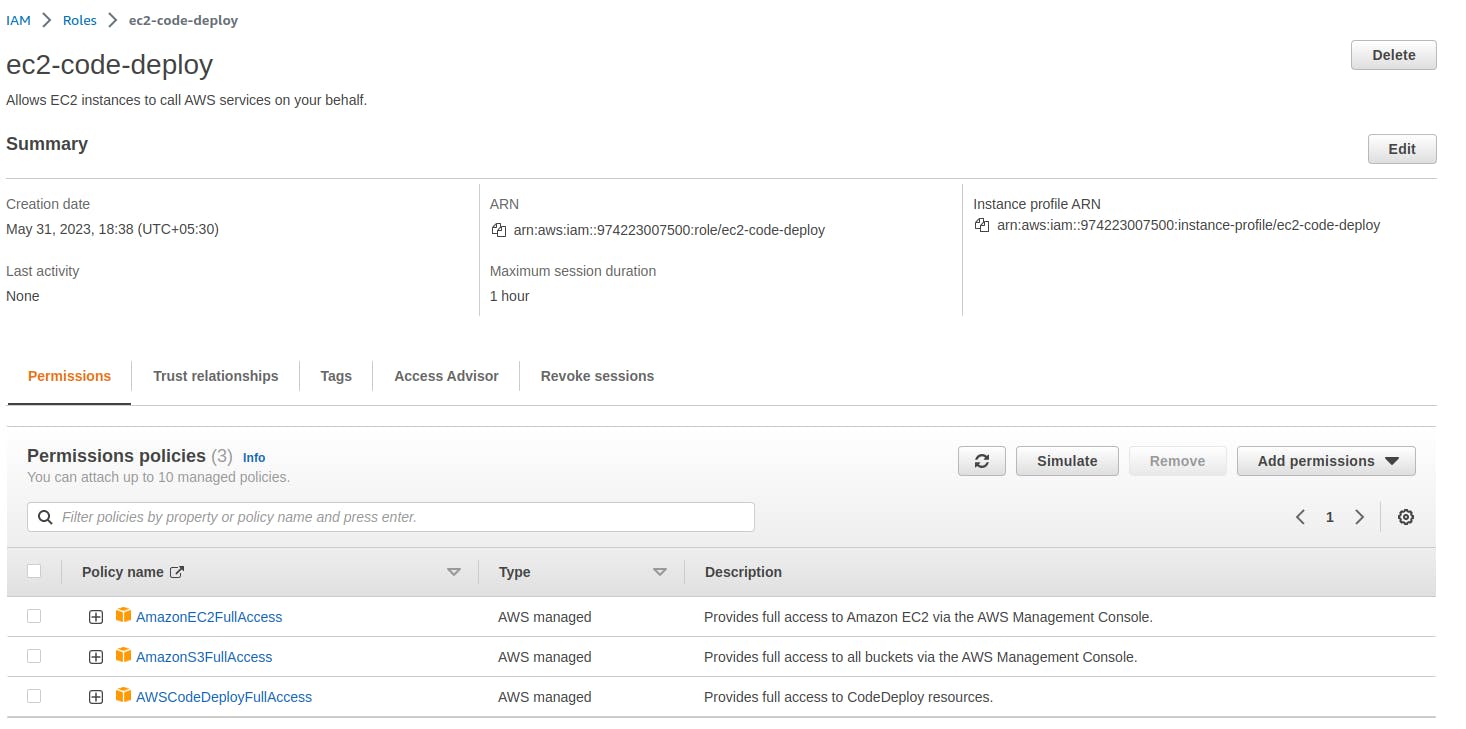
So, create a new service role for enabling communication between EC2 and S3, code deploy.
Create a role for giving access to EC2 instance with all the necessary permission policies as shown below.
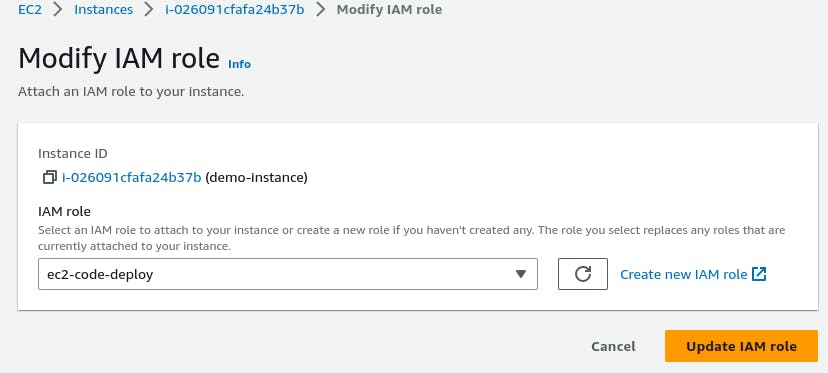
Now, navigate to the instance and modify the IAM role. Select the IAM role created above.

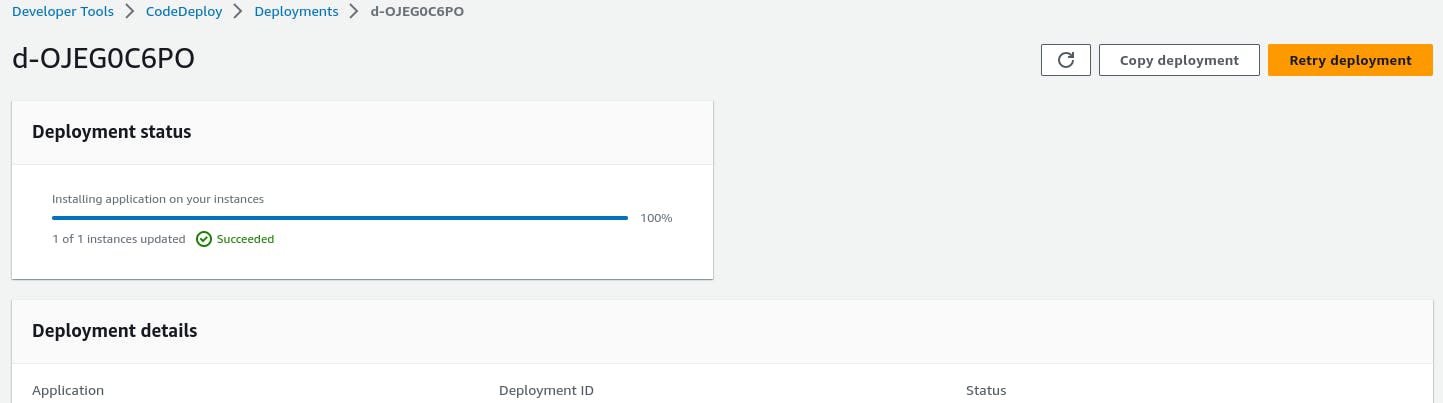
Restart the codedeploy-agent in the EC2 instance.

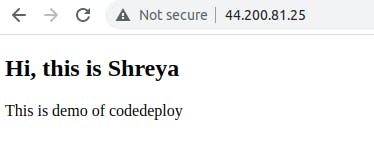
Finally, the Code deployment is successful.
Verify the Public IP of the instance to view the Webpage.
Thank you for reading!!
~Shreya Gupta
Great initiative by the #trainwithshubham community. Thank you Shubham Londhe
#devops #90daysofdevops #aws #iam #awsprojects #cicd