Day 3 - Managing Resources
Day 3 of TerraWeek

I am a software engineer having working experience of 4+ years. I have been a part of web development and have hands-on experience in Laravel, Html, Codeigniter, CSS, PHP, OOPS, Bootstrap, React, Javascript, jQuery and Linux. Currently learning DevOps, AWS & more skills.
Create a Terraform configuration file to define a resource of AWS EC2 instance.
Create a Terraform configuration file (
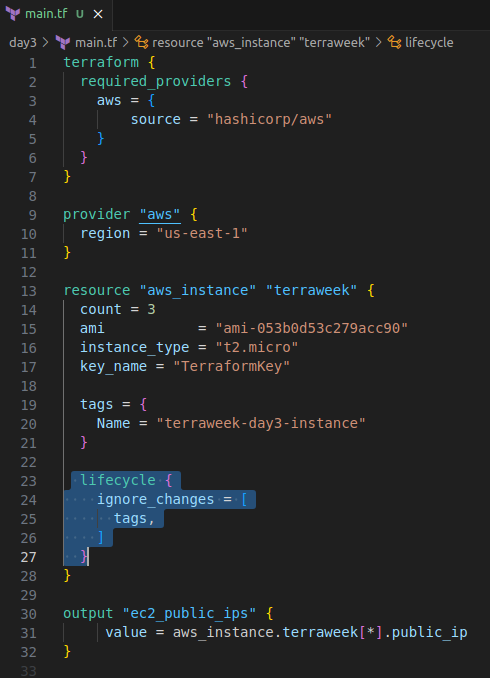
main.tf) that defines an AWS EC2 instance resource.terraform { required_providers { aws = { source = "hashicorp/aws" } } } provider "aws" { region = "us-east-1" } resource "aws_instance" "terraweek" { count = 3 ami = "ami-053b0d53c279acc90" instance_type = "t2.micro" key_name = "TerraformKey" tags = { Name = "terraweek-day3-instance" } } output "ec2_public_ips" { value = aws_instance.terraweek[*].public_ip }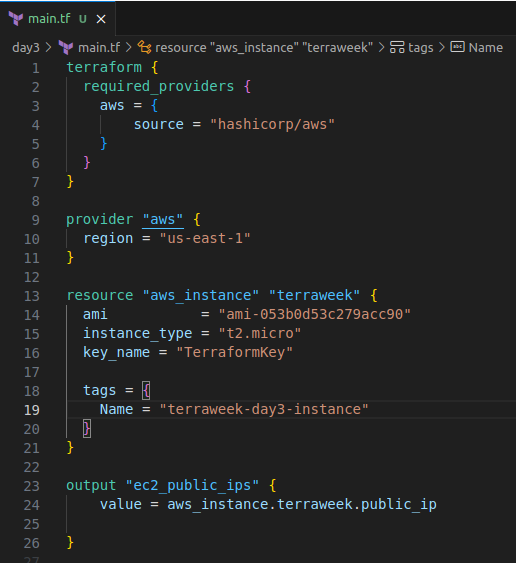
Check state files before running the plan and apply commands & Use validate command to validate your tf file for errors and provide the Output generated by each command.
To check the current state of your infrastructure without making any changes, use the terraform state list command. This command lists all the resources managed by Terraform. Alternatively, if you want to check the details of a specific resource, you can use terraform state show <resource_address>. Replace <resource_address> with the address of the resource you want to inspect.
Run the
terraform initcommand to initialize the Terraform project.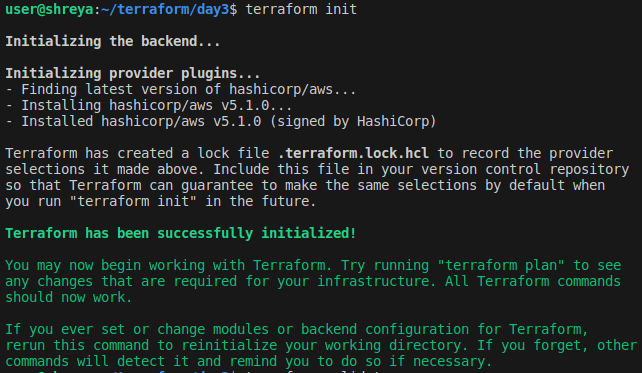
To validate Terraform configuration file for errors, run the
terraform validatecommand.
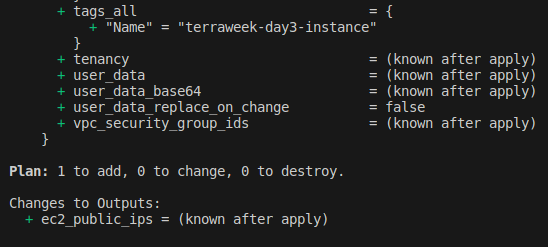
To see the execution plan before applying the changes, run the
terraform plancommand.
If the plan looks good, you can apply the changes and create the EC2 instance by running the
terraform applycommand.
Run the
cat terraform.tfstatecommand to check the state file.

Terraform will create an EC2 instance based on the specified configuration in the
main.tffile.
Add a provisioner to the configuration file to configure the resource after it is created and use Terraform commands to apply for changes and destroy to remove resources.
🛑 Provisioners
Provisioners are used to execute scripts or perform actions on a resource after it is created or destroyed. They allow you to perform additional configuration or setup tasks that go beyond the scope of resource definition.
Provisioners are commonly used for:
Configuration management: Provisioners can execute scripts or configuration management tools (such as Ansible, Chef, or Puppet) to configure the resource after it is created.
Software installations: Provisioners can install and configure software packages on the resource. For example, you can use provisioners to install application dependencies or set up required software components.
File transfers: Provisioners can transfer files from the local machine to the resource or vice versa. This is useful for copying configuration files, scripts, or other artifacts to the provisioned resource.
Initial data population: Provisioners can populate initial data into a database or perform other data-related tasks to set up the resource.
Terraform provides several built-in provisioners, including local-exec, remote-exec, file, and null. The local-exec provisioner executes commands locally, while the remote-exec provisioner executes commands on the remote resource over SSH or WinRM.
The
provisionerblock is added within theaws_instanceresource block. It specifies alocal-execprovisioner, which allows you to execute a local command on the machine running Terraform. In this case, the command is simply echoing a message.
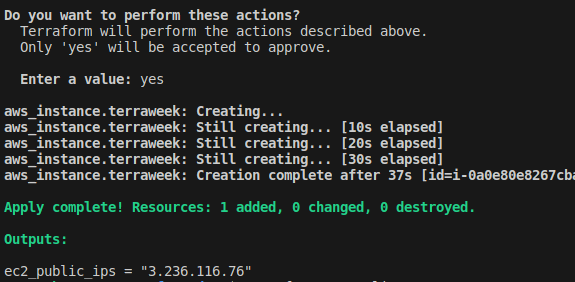
Run the
terraform applycommand to execute the changes and create the EC2 instance.

Instances are created now.

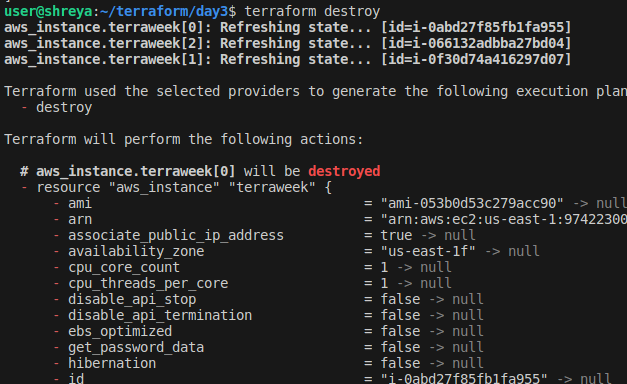
Run the terraform destroy command to destroy the instances and see the local message which we have written in the provisioner block when destroy executes.

Add lifecycle management configurations to the configuration file to control the creation, modification, and deletion of the resource and use Terraform commands to apply the changes.
The lifecycle meta-argument in Terraform allows you to define various lifecycle management configurations for resources. It provides fine-grained control over the behavior of resources during their lifecycle, including resource creation, modification, and destruction.
create_before_destroy: This configuration controls the order of resource creation and destruction during updates. When set to
true, Terraform will create the new resource before destroying the old one, minimizing downtime.lifecycle { create_before_destroy = true }prevent_destroy: By setting this option to
true, Terraform prevents the destruction of the resource. It helps to safeguard critical resources from accidental deletion.lifecycle { prevent_destroy = true }ignore_changes: This configuration allows you to specify resource attributes that should be ignored during updates. Terraform will not consider changes to these attributes when planning updates.
lifecycle { ignore_changes = [ "tags", "user_data", ] }ignore_unchanged: By default, Terraform considers all attributes for replacement if they are present in the configuration, even if they haven't changed. Setting
ignore_unchangedtotruemakes Terraform ignore unchanged attributes during updates, reducing unnecessary modifications.lifecycle { ignore_unchanged = true }
In the configuration file add a lifecycle block to ignore changes.
Run
terraform applyto create instances.
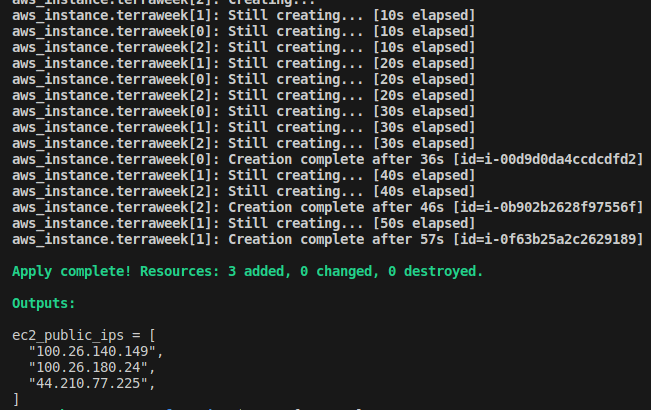
Instances are created now.

Now change the name of instances and run
terraform applycommand again to apply changes but it has not changed anything because I have addedignore_chnagesfor tags.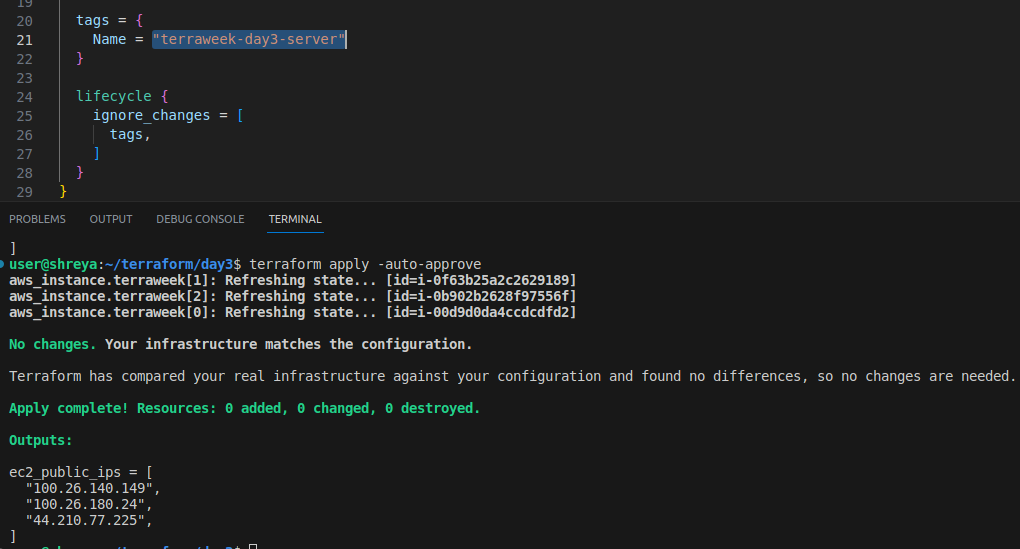
Thank you for reading!!
~Shreya Gupta
Great initiative by the #trainwithshubham community. Thank you Shubham Londhe
#devops #terraweek #terraform #terraformresources